Sunday, 23 September 2012

Getting Orgaised - Belts

I cannot believe my last post was nearly a month ago! Everything's been so hectic this past month, I had no idea how much time had passed! The reason I've been gone so long is that I have a new job! It's been a big shock to the system going from having pretty much nothing to do all day, to working 45+ hours a week! I'm still trying to get all this time management stuff figured out, but in the mean time there will be the odd post popping up now and again.
-I definitely have a new found respect for bloggers with full time jobs, especially those who post daily - seriously, HOW DO YOU GUYS DO IT?!

Getting Organised
I decided to have a series of posts on my blog dedicated to getting organised. I am a bit of a hoarder, and hold onto a lot of useless rubbish, have too many clothes that I never wear, and have make up I never use. Every now and again I pretty much turf everything out of my room, get rid of things I don't need, and re-organise everything I'm keeping. Seeing as I'm now going through one of those phases, I figured I'd show you how I'm organising things, and maybe it will help give you some ideas on storage and how to save space.

Belts

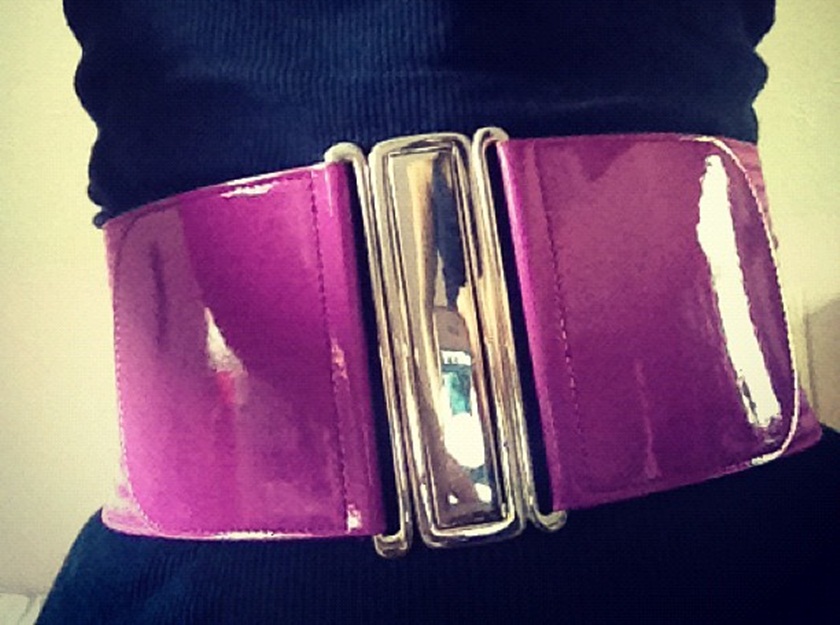
One of my biggest obsessions are belts. Particularly waist belts (which I'm so happy to see are back in a big way for A/W), and although I probably have way more than I need, I still want more! Previously I had my belts hanging on my door on the same kind of hanger I use to organise my scarf's (see post here), but I found it warped some of the belts, and was sometimes a bit of an effort to put belts back onto, so they ended up strewn across my room. So here's how I've re-organised them:


On the left are waist belts that would get ruined if I rolled them up, so I've stored them length-ways to keep their shape. In the centre I've used 2 small Ferrero Rocher boxes to store my slim non-waist belts, which I rolled up and stored side-by-side. Finally on the right are my elasticated waist belts that can be rolled up easily, and stored more compactly.


It's so much easier to see what I have, and so much easier for my to put the belts away at the end of the day.
Seeing as I'm a bit of a belt freak, I'll be storing the box under my bed for easy access!

I'd love to know how you store your belts?


SHARE:

Wednesday, 29 August 2012

Fighting Acne Breakouts

As you know, I like to post about DIY beauty on here from time to time, and I always trial them out before I write about them. Well about a month ago I was using Rose Water as a toner, as I'd heard a lot of great things about it, and after a few days of using it my skin had broken out in acne (so you definitely won't see me recommending rose water on here).

I used to suffer with acne as a teen, and I guess my skin is still quite acne-prone. I usually get the odd breakout now and again, but this was the first time I'd seen my face covered in acne since I was a teenager, but unlike in my teens (where the acne was mostly small bumps), this time a lot of it looked cystic. I stopped using the rose water straight away, but my usual drug store skincare was doing nothing.

I'm a huge fan of Caroline Hirons blog, as she is very big on skincare and if I ever need advice it's the first place I go. I've heard her recommend REN to a lot of people, and found they sold a cleanser for blemish prone skin, so I picked this up and a sample of their 'Invisible Pores Detox Mask'.
I have to say I'm pretty impressed with REN so far, and I saw the acne disappear so fast.

Of course it didn't go away over night, but after a month of using this regime (listed below) my skin is almost back to normal. Even the cystic acne has practically gone. They've turned into normal spots now, and I can tell they'll pretty much be gone in a day or two. I think a month is pretty amazing, seeing as when I was a teenager I had it for YEARS.

My Regime
Morning
REN Clarifying Clay Cleanser
REN Invisible Pores Detox Mask (2-3 times a week)
REN Hydra-Calm Global Protection Day Cream

Evening
REN Clarifying Clay Cleanser
Freederm 'Fast Track'
(I've found this really helped with the cystic acne, as it helped to reduce them quite fast. You can use this in the morning too, I just tend not to though as it makes my skin look dry, so it doesn't look great under makeup)
REN Hydra-Calm Global Protection Day Cream

I didn't want to add too many products to my regime as I didn't wan't to aggrevate the problem further. Once I'm completely out of the woods, and my skin has settled, I definitely want to add more products just to help take care of my skin in other ways, not just at fighting breakouts. 

This regime worked for me, but everyone's skin is different. My skin is quite sensitive and reacts quite easily to products (as you can tell by my reaction to rose water). I think investing in a decent regime is very important. I know for a lot of people acne is caused my hormones, but my skin is quite hormonal too so I do think a good regime helps, but you may also need to look into your diet and hormone levels too to combat the problem fully. It's also worth going to your GP, or even participating in Carolines clinics, which pop up on her blog from time to time, if you need more guidance. 

I hope you found this post helpful in some way. It worked so fast for me I thought it was definitely worth sharing with you guys.
Do you have any tips for combating acne and/or breakouts?


SHARE:

Tuesday, 14 August 2012

Stylebook


I thought I'd do things a little differently today and review my favourite iPhone app. I downloaded it last year, and have loved it ever since!

Sometimes it's easy to forget about items that are hiding in the back of the wardrobe, and its even easier to get stuck in a rut, wearing the same outfits and sticking with what is 'safe'.
This app helps you catalogue your entire wardrobe from tops, to shoes, to accessories etc. That way you can see what you have, and create as many looks as you want with the items in you wardrobe. So you can see what works, what doesn't, and come up with new looks you probably wouldn't have thought of before - all without having to turf everything out of your wardrobe or make a mess - which, lets face it, a lot of us do!

It's also handy to have on your phone while you're out shopping and trying to decide on new items, as you can see your entire wardrobe and can buy things that actually go with what you already own, rather than buying things that don't go with anything, or (something I've done far too many times) accidentally bought different versions of the same thing!

I thought I'd take you through the ins and outs of the app so you can see why it's my favourite:

Organising Your Wardrobe

In the 'Closet' section you'll find all of your items, which you can organise however you want. I have categories for Tops, Dresses, Bottoms, Outerwear, Accessories etc. Within each of these categories you can add subcategories. So within my Shoes category, I have Flats, Boots, Heels etc. Above you can see all of my high heels (my shoe collection has been a bit neglected).

Adding New Items

To add items to your 'Closet', you need a photo of each item. The easiest way to do this is to try and find a photo of your clothes online, as these are photographed with a plain white background and have great lighting, and are so much easier to edit. 
However, if you can't find the item online, you'll need to take the photo's yourself. It works best if you have a plain white background, and try to take it in a well lit room (natural lighting is best). You can edit the background away within the app, but if the item is a bit of a fiddly shape I prefer to edit it on my laptop first using photoshop (there are free programs out there that are similar).

Creating Outfits

Once you've added your items to the app, you can start creating looks with them. Above are a few examples of looks I've made with my clothes, and you can arrange them into categories to help make it easier to decide on a look. For example if I can't decide what to wear on a night out, I'll just look at the outfits I've made in the 'Evening' section.

Inspiration

You can also use this app to collect images that inspire you, so if you see photos of inspiring looks that you love, you just save the photo in the 'Inspiration' section, and then when you're out shopping you can use it to help you find the types of clothes you need to recreate the look for yourself. 

I use this section a lot, and use it to inspire my makeup and hair styles too.

Planning Your Looks

The calendar section is handy to plan what outfits to wear in advance, so you don't have to stress about what to wear, and you can see at a glance what looks you have planned. It also helps that you can see what you've been wearing so don't accidentally keep wearing the same outfit.

Packing

As you can see I haven't really used this section, but here you can plan what items you want to take with you on holiday, or for a weekend away. If I ever DO go away this year, I'll definitely be using this as I have a habit of packing far to much, and not getting much wear out of it, or still feeling like I have nothing to wear because none of it goes together!

Style Stats

I really like this section of the app. It tells you what your most and least worn items/looks are. So if your wardrobe is getting a bit crowded, you can look here and see what you've never worn (and most likely never will wear) then you can decide whether you even really need it. Though you may also find you've just not worn them because nothing you own goes with it, so it could help you see what kind of items you do actually need in your wardrobe.

Final Verdict

I haven't got around to putting my whole wardrobe on here yet, and some of the photos that are on here I want to retake, but I'm planning on finishing it before the end of summer so I can finally start making outfits with my entire wardrobe.

This app cost £2.49, and there is a men's version of this app too.
It does seem a lot for an app, but there are no more add ons to purchase, and I really do think it's worth it for all the features. I definitely haven't regretted buying it.
-I've downloaded a 'free' app like this before, but it wasn't as good, and you could only add 5 items on there. If you wanted to add more you had to pay, which I thought was really misleading, and the end cost would have worked out so much more than this app for less features. I thought that was ridiculous, so I just deleted it.

This app, however, I'm seriously impressed with. The only downside to this app is that it's not available on android yet, only iPhone. But they are bringing out an iPad friendly version soon.
If you do have an iPhone and need inspiration when it comes to outfits, then I highly recommend this to you!

Have you tried this app before? What did you think?

SHARE:

Monday, 13 August 2012

Real Techniques Stippling Brush Review


So you've probably been seeing reviews of Real Techniques makeup brushes, particularly for the Stippling Brush, so I doubt this needs another review. But it's still getting one!

I decided I wanted to buy more animal friendly brushes, so I started looking into synthetic ones. I also needed a better brush for applying my mineral foundation, so I thought I'd give this one a go. Before I ordered this one, I was using Elf's buffing brush, but wasn't really impressed with it. I ordered this brush from Love Makeup, and it arrived really quickly.

I have to say I love this make up brush! I know most people recommend buffing brushes for applying mineral foundation, but this stippling brush does the job perfectly, and gives me a flawless finish. It's amazing the difference a great brush can make to your makeup! I've mentioned before that I have a small head, and obviously with that means I have a small face, So I usually find most makeup brushes a far too big for my face, but this one is perfect! It fits my face well, and gets into all the contours around my nose and cheeks for great coverage.

I think this brush would also be great for applying powder blush too as it's narrow enough for contouring.
As I don't use liquid foundations or cream blushes, I can't comment on how well it works with those, but there are plenty of reviews out there where the user has used it to apply a liquid foundation.
The bristles are very dense, and not too long or flimsy. It's a nice sturdy brush, and it is so much better than any other stippling brush I've used! And it doesn't irritate my skin either (I've had troubles in the past with some brushes).

One of the things I really like about it is the base of the handle, which is flattened so it can be stood up on your desk. Though if you like to keep your brushes in a jar/pot then this may be a problem as its quite bulky, so may be too awkward to fit in with all of your other brushes. But thats the only 'downside' I can see to this brush

I would recommend this brush to absolutely anyone! It's no wonder these brushes have received so many rave reviews if this one is anything to go by. I think I may have a problem, because I want to go and buy the rest now!

Have you used any of the Real Techniques brushes? Which is your favourite?


SHARE:
@ Beauty Not Just Skin Deep.